79 Decathlon restoration

Cindy

Active member
Joined
Jun 20, 2020
Messages
26
Location
Eastern Shore of Maryland
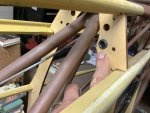
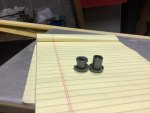
Hi everyone! I'm working on my 8KCAB, and I'm about to put new wood bulkheads in. Does anyone have a recommendation on the best eyelet tool to fasten them to the airframe, before I go to Michaels and see what they have? Thanks, Cindy
 

Bruce

Well-known member
Joined
Dec 22, 2018
Messages
439
Location
Knoxville TN
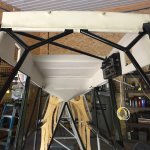
Have you bought the bulkheads? If so did they come with guides for the trim cables? As for rivets I just used #4 bolts and lock nuts. If u have not and u buy them from ACA have them install the guides. Best of luck with the project.
 

Cindy

Active member
Joined
Jun 20, 2020
Messages
26
Location
Eastern Shore of Maryland
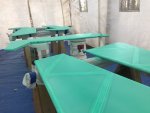
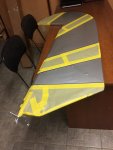
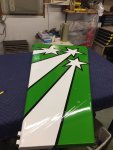
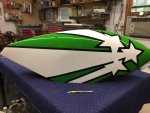
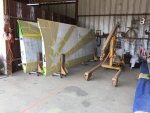
I bought them from Rainbow, and they already have the trim cable guides in them. The eyelets are for attaching the bulkheads to the airframe. I got those from ACA. This is the last big push...wings are ready for final coat of urethane, and tail pieces, window and wheel pants are all done. Once the fuselage is covered, we can do the final paint on the door and cowling as well.
 

Bruce

Well-known member
Joined
Dec 22, 2018
Messages
439
Location
Knoxville TN
Sounds good we’re under the project section with lots of pictures, I shot my first color and am using the Stewart's system. See some pictures when you can and where are you located, there’s some way to add that under your information.
 

Bruce

Well-known member
Joined
Dec 22, 2018
Messages
439
Location
Knoxville TN
Looking good please keep photos of how ur doing fuselage as this is the next step I am about to tackle,And I’ve been trying to figure out how to make this seem without making a envelope
 

Cindy

Active member
Joined
Jun 20, 2020
Messages
26
Location
Eastern Shore of Maryland
Looking good please keep photos of how ur doing fuselage as this is the next step I am about to tackle,And I’ve been trying to figure out how to make this seem without making a envelope
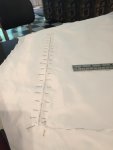
I've done a lot of thinking about it, and I've looked carefully at the old fabric, which was installed at the factory. I plan to pin both sides along the seam line, sew it, and trim as necessary. It's probably not the most efficient use of the fabric, but without a pattern (which is what I'm sure the factory had), there's no way to accurately cut to size based on the already-shrunk old fabric. Once that seam is fitted, I'll be able to drape the fabric and fit it to the rest of the fuselage. The seam goes from the very back top of the tail to the greenhouse. They used a single seam (not french fell), with a second reinforcing seam 1/4" from the first. It lays very flat and is nearly invisible after tapes and paint. You'll have to be very careful when shrinking that the seam stays centered on the tubing and the top of the fuselage.
 

Bruce

Well-known member
Joined
Dec 22, 2018
Messages
439
Location
Knoxville TN
I’ve stared at this along time and was thinking of overlapping the fabric to stringer the coming from the other side and glueing the seam which would then have reinforcing tape just not sure if this is a correct way. So please keep showing how you are doing this I’m in Montana then going to Glacer and back to Wyoming so I have about 5 weeks before I’m back on my project. My headliner was returned after they made it wrong the first time which stoped me.
 

Bob Turner

Well-known member
Joined
Apr 4, 2018
Messages
2,864
I have had some luck shrinking suurface tape to joggle the sewn seam inward. Doesn't work if the stitches lay on the stringer. It really is too bad that the word "structure" is interpreted to not include stringers - the blanket method is surely easier and just as safe.

That paint is artistry! Very nice.
 

Bob Turner

Well-known member
Joined
Apr 4, 2018
Messages
2,864
Bruce and I posted at the same time. I believe the J3 was done "blanket" style at the factory, with five pieces, and glued seams on the top three wood formers. Never heard of a Cub shedding fuselage fabric. The Aeronca may have been the same - a slightly more complicated shape. And back then, their glue was just nitrate dope!

My first recover the supervising mechanic wanted a seam on the wing leading edge - the "flat fell" that Cindy uses. Of course it was centered on the leading edge and wobbled around a bit. It took a bunch of work and automotive glazing putty to make that seam go away. I have since used the legal 4" glued overlap (2", I think, for Stits). I really hate stitched seams.
 
Last edited:

Cindy

Active member
Joined
Jun 20, 2020
Messages
26
Location
Eastern Shore of Maryland
I’ve stared at this along time and was thinking of overlapping the fabric to stringer the coming from the other side and glueing the seam which would then have reinforcing tape just not sure if this is a correct way. So please keep showing how you are doing this I’m in Montana then going to Glacer and back to Wyoming so I have about 5 weeks before I’m back on my project. My headliner was returned after they made it wrong the first time which stoped me.
I think that you can overlap the fabric, but I believe it has to be a 2" overlap (check this with the Ceconite manual to be sure). If you don't have a sewing machine, this might be the best way. The rest of my fabric just arrived today, and it's 95 degrees in the shade, so I'm not planning to work on it until we get a cooler day, but I will keep you informed. Have fun in Glacier, it's one of my favorite places on earth. I got to see a moose close up when I was there!!
 

Cindy

Active member
Joined
Jun 20, 2020
Messages
26
Location
Eastern Shore of Maryland
I have had some luck shrinking suurface tape to joggle the sewn seam inward. Doesn't work if the stitches lay on the stringer. It really is too bad that the word "structure" is interpreted to not include stringers - the blanket method is surely easier and just as safe.

That paint is artistry! Very nice.
One more consideration, there isn't any structure in the exact middle of the top of the fuselage that you could glue fabric to. There are stringers to the sides (not suitable for gluing to), and the wood formers (also not suitable), so I think for me, on the Decath, the only option is a sewn seam. On the bright side, though, the seam won't be pressing on anything so it won't show much.
 

Bruce

Well-known member
Joined
Dec 22, 2018
Messages
439
Location
Knoxville TN
Well u can buy an envelope for about $400 which is an option but like you I have the fabric just not the knowledge of how to make and sew the envelope so if you make your own please show us how(or me at least)
 
Last edited by a moderator:

Bob Turner

Well-known member
Joined
Apr 4, 2018
Messages
2,864
Yes. Before really tightening the fabric completely, glue the outer 1" of a length of 4" surface tape over the seam, then when it is dry (24 hrs) carefully shrink the center 2" of the tape. Not much; just enough to hide the stitches.

I will look next time - the guy (or girl) who did my Decathlon in 1992 was a master. No seams showing anywhere! I bet he glued to those stringers. Better than me, and I am pretty good.
 

Bruce

Well-known member
Joined
Dec 22, 2018
Messages
439
Location
Knoxville TN
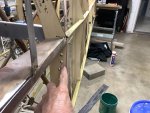
Cindy I just looked at your pictures if you have not closed up the airframe look at where the trim cables go through bulkheads there should be some guides I do not see in the pictures, I added some pictures to show what I am talking about much easer to do before fabric is done. Pictures look great! 2742B03C-5E61-4919-8941-F4D69DF08BB6.jpeg8CB21F9F-450C-4DFB-94F5-508862C03A01.jpegA72FD5FB-104A-4D47-8487-206512DF7A9D.jpeg
 

Cindy

Active member
Joined
Jun 20, 2020
Messages
26
Location
Eastern Shore of Maryland
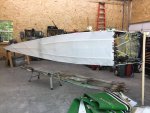
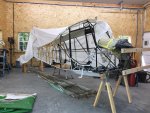
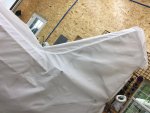
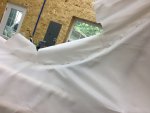
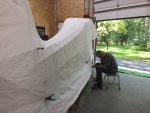
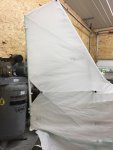
I did some sewing the other day, and I've got the top fabric glued on at the tail. I need to turn the fuselage over so I can glue the top to the bottom. Attached are some pictures of my fitting my girl for her "wedding dress" (that's really what it feels like), pinning and the glued tail. I was super worried about it, but it seems to have come out nicely.IMG_6075.jpgIMG_6076.jpgIMG_6077.jpgIMG_6083.jpgIMG_6089.jpg
 

Cindy

Active member
Joined
Jun 20, 2020
Messages
26
Location
Eastern Shore of Maryland
Bruce, we did run the trim, rudder and elevator cables already...the guide holes were there, so it wasn't a problem. also ran the electrical wire for the taillight. Thanks for checking tho.
Cindy I just looked at your pictures if you have not closed up the airframe look at where the trim cables go through bulkheads there should be some guides I do not see in the pictures, I added some pictures to show what I am talking about much easer to do before fabric is done. Pictures look great! View attachment 2508View attachment 2509View attachment 2510
 

Bartman

Administrator
Staff member
Joined
Mar 27, 2018
Messages
3,711
Location
New Jersey, USA
Really appreciate the photos Cindy, looks like you're doing really nice work, they'll be there for the next person which is why we're here. :)

I heard back from the factory, they'll sell the sheet fabric with the sewn seam. Chad in parts would be the person to call for whomever wants to go that route.