I rigged my 7ECA with zero washout/in. It's your call but that's what I did with mine.
You are using an out of date browser. It may not display this or other websites correctly.
You should upgrade or use an alternative browser.
You should upgrade or use an alternative browser.
1979 7ECA Recover
- Thread starter Vtailman
- Start date
Factory does 0. I too went with 0.
Would you mind taking a photo or two of the vent routing on your left wing? I'm getting mine together, but have no reference, and it looks like the vent tube sticking out of the wing is in front of the spar?
Thank you
Would you mind taking a photo or two of the vent routing on your left wing? I'm getting mine together, but have no reference, and it looks like the vent tube sticking out of the wing is in front of the spar?
Thank you
Much appreciated.Factory does 0. I too went with 0.
Would you mind taking a photo or two of the vent routing on your left wing? I'm getting mine together, but have no reference, and it looks like the vent tube sticking out of the wing is in front of the spar?
Thank you
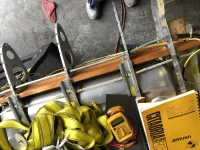
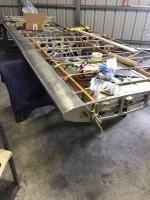
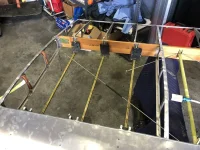
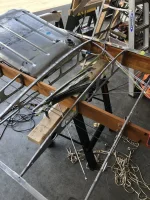
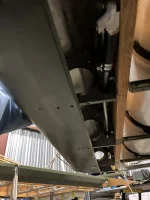
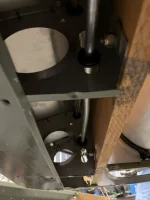
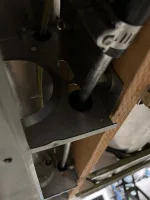
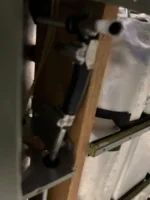
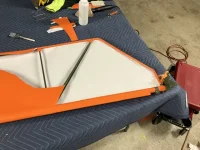
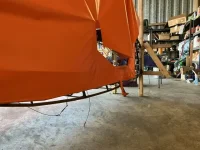
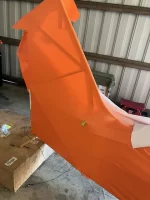
certainly - here is what I’ve got for now showing the vent routing. I can get some more pictures next time I’m at the hangar, likely this weekend. I have 18 gallon tanks. Some of these are the right wing - Fyi.
The vent lines run from the check valve in between the spar and leading edge (there are small spruce spacers and thick anti chafe plastic heat shrink type tube where they pass through) that prevent chafing the vent or tube. The vent tubes run forward of the spar, and the vent is forward of the spar. The routing on the left and right sides go through different holes in the nose ribs if I recall correctly.
Attachments

Little delay but hope these helpThats perfect, Thank you
Attachments
-
 IMG_9903.webp97.5 KB · Views: 63
 -
 IMG_9902.webp119.4 KB · Views: 57
 -
 IMG_9901.webp66.2 KB · Views: 56
 -
 IMG_9900.webp58.6 KB · Views: 54
 -
 IMG_9899.webp70.9 KB · Views: 56
 -
 IMG_9898.webp168.7 KB · Views: 55
 -
 IMG_9897.webp80.1 KB · Views: 55
 -
 IMG_9896.webp60.7 KB · Views: 53
 -
 IMG_9895.webp151.4 KB · Views: 61
Little delay but hope these help
Perfect Timing! I was going to go to the shop and finish up that venting tomorrow morning!
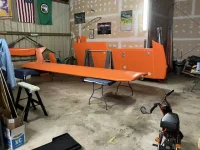
The left hand wing is ready to cover! Coming down to the garage once the control surfaces are finished. Speaking of which - one stabilizer is done save for drain holes, which I will lay out this week and burn in with a soldering iron.
Stab, rudder and elevators are left before the wings come down. This stab took about 11.5 hours. The next should take maybe 8 - maybe less. We’ll see. Laying out the glue lines for the finish tapes is a little bit fiddly and is so far, my absolute least favorite part of this process. As well, another annoyance is that my Toko ski wax iron base isn’t flat, so it doesn’t make great contact with the finishing tapes. The heat gun and felt blade seems to work a lot better.
Bit of a snag on the right hand wing repair but have a path forward - will require a bit more work than anticipated and a repair approval for so I’ll need to work up a document and some calcs.
Attachments


Jeez it’s been a while since I’ve posted an update.
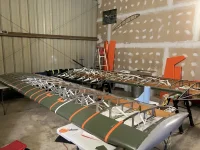
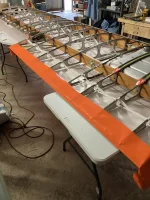
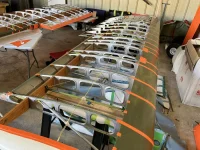
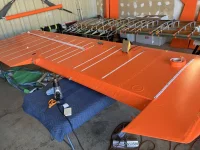
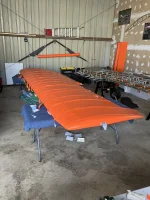
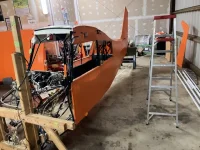
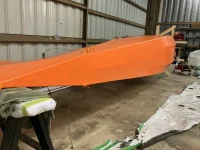
Since the last post, the rudder is covered, and one wing is ready to roll. I’ve totaled up the man/woman hours spent on wing covering so far. Not prep, just covering (includes cutting/preparing and bonding on strips of anti-chafe fabric) - 135 hours.")
Hopefully the next wing goes a little quicker. But at least I’m not wearing a respirator in the summer heat…
Since the last post, the rudder is covered, and one wing is ready to roll. I’ve totaled up the man/woman hours spent on wing covering so far. Not prep, just covering (includes cutting/preparing and bonding on strips of anti-chafe fabric) - 135 hours.
Hopefully the next wing goes a little quicker. But at least I’m not wearing a respirator in the summer heat…
Attachments
-
 IMG_0343.webp191.3 KB · Views: 49
 -
 IMG_0342.webp140.8 KB · Views: 49
 -
 IMG_0441.webp193.3 KB · Views: 47
 -
 IMG_0455.webp243.8 KB · Views: 47
 -
 IMG_0468.webp109.4 KB · Views: 48
 -
 IMG_0488.webp60 KB · Views: 49
 -
 IMG_0676.webp183.2 KB · Views: 49
 -
 IMG_0696.webp155.1 KB · Views: 46
 -
 IMG_0697.webp222.6 KB · Views: 46
 -
 IMG_0703.webp186.8 KB · Views: 48
Bruce
Well-known member
Looking good.
Right hand wing has skin on the bottom - reinforcement tapes and rivets to go before the upper skin goes in. I’m starting to see the light at the end of the tunnel.
Measured out the remains of the fabric and finishing tapes and the way I’ve been covering it turns out we’ll be a bit short. So I’ve got more on order - hopefully a short lead time.
I’m starting to feel more comfortable with this system. Tip to anyone using Oratex in the future who may stumble across this post - one needs to use hot heat gun settings in conjunction with the temperature scanner to get the right shrink. I’ve had to set my heat gun to 350C, 200C on the heat gun just wasn’t getting the fabric surface to anywhere near 200C (max fabric temp). Also - a model airplane covering iron works wonders in tight spots where the Toko won’t fit.
Attachments

Is this Oratex covering? How are you liking the process? This is the first Citabria I've ever seen being covered in it. I am planning to rebuild my wings soon and was planning on using Stewarts because I had never known anyone to use Oratex.
It is Oratex. I think Lars (the sales/tech rep) has covered a citabria in oratex.Is this Oratex covering? How are you liking the process? This is the first Citabria I've ever seen being covered in it. I am planning to rebuild my wings soon and was planning on using Stewarts because I had never known anyone to use Oratex.
It has pros and cons. I love that there is no MEK but Stewart’s is the same way. Plus you need to use MEK or similar to get the old glue and cheesecloth off the wing. All bare metal also needs to be primed. It being pre colored is awesome. I’ve got a pile of airworthy parts ready. I’ve done the poly fiber course at Oshkosh and found it a little easier to work with.
I’m happy to chat about my experience over the phone, feel free to send me your info in a PM and I can give you a call.
I’ve been really lax here!!
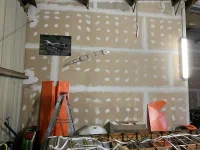
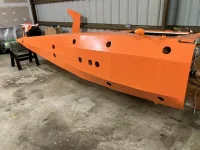
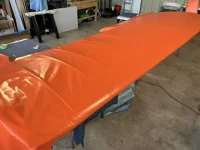
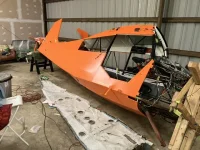
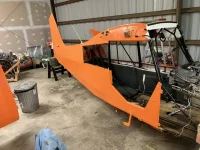
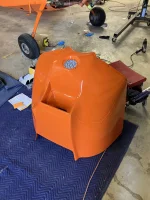
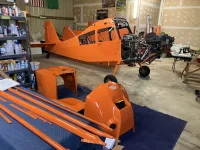
Wings covered, fuselage covered. Parts getting ready for the paint shop and beginning major reassembly soon!! The cowls may get covered in fabric after paint. Haven’t decided yet.
The shrinking is satisfying. Need to total it up but so far I’m at about 550 hours on this job.
By the way - anyone using oratex in the future would be well advised to buy the tape primer granules. They make the tapes stick 10000% better.
Attachments
-
 IMG_2019.webp32.6 KB · Views: 25
 -
 IMG_2018.webp58.2 KB · Views: 21
 -
 IMG_1147.webp13.2 KB · Views: 20
 -
 IMG_1126.webp51 KB · Views: 19
 -
 IMG_1125.webp40.5 KB · Views: 19
 -
 IMG_1093.webp48.6 KB · Views: 21
 -
 IMG_1005.webp50.8 KB · Views: 23
 -
 IMG_0988.webp56.8 KB · Views: 23
 -
 IMG_0901.webp39.5 KB · Views: 22
 -
 IMG_2806.webp49.3 KB · Views: 22
 -
 IMG_0845.webp37 KB · Views: 21
 -
 IMG_0844.webp59.5 KB · Views: 20
 -
 IMG_2430.webp52.8 KB · Views: 21
 -
 IMG_2488.webp35.1 KB · Views: 20
 -
 IMG_2534.webp55.3 KB · Views: 20
 -
 IMG_2577.webp40.3 KB · Views: 22
 -
 IMG_2808.webp54.3 KB · Views: 20
 -
 IMG_2868.webp65.8 KB · Views: 21
 -
 IMG_2748.webp49.9 KB · Views: 21
 -
 IMG_2747.webp67 KB · Views: 22
 -
 IMG_2866.webp55.2 KB · Views: 25
 -
 IMG_2867.webp63.9 KB · Views: 22
 -
 IMG_2205.webp40.1 KB · Views: 26
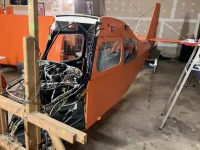
Getting closer. Put much of the interior in, at least enough to sit in the back seat and make airplane noises. Tail feathers are installed save for the trim tab which is waiting on paint.
Need to get the new fuel valve bracket welded in, then continue the reassembly!
Need to get the new fuel valve bracket welded in, then continue the reassembly!
Attachments


Last edited:
The orange looks really nice and the gray interior is perfect for it. And thanks for the Oratex tips along the way, that'll be helpful to the next person giving this a try. 
Thanks! Aerographics was really helpful with some red decals that will go on when it’s fully reassembled. Excited to see how that works out.The orange looks really nice and the gray interior is perfect for it. And thanks for the Oratex tips along the way, that'll be helpful to the next person giving this a try.
One of the tricky bits with oratex is the doilies around the inspection holes. Some people say you don’t need them, my reading of the EASA manual is that you do. It’s hard to mask a circle, and you don’t want the glue to extend beyond the edge of the doily as it becomes brown in sunshine. The result is you can have a weak bond at the very edge of the doily if your glue is only on one surface. My fix has been to try and peel the edges and then take a syringe and inject a tiny bit of glue under the unbonded portion. You can rub off uncured glue with your fingers, but once it’s cured, all bets are off.
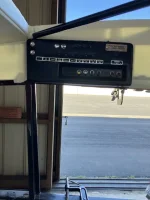
She’s off the rotisserie and ready to install the new fuel valve from ACA!
The latest fuel shutoff valve is a much different design and is in a different location than the Bellanca valve.
Once the gear is back from paint - it’ll be on the gear and ready to put the engine and wings back on.

The latest fuel shutoff valve is a much different design and is in a different location than the Bellanca valve.
Once the gear is back from paint - it’ll be on the gear and ready to put the engine and wings back on.
Attachments
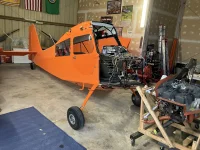
The paint shop got my parts all wrapped up this past Friday so over the weekend I got it on the gear. Depending on whether I can get a couple friends to assist or not over the next weekend I’ll work on installing the boot cowl or putting the wings on
Attachments
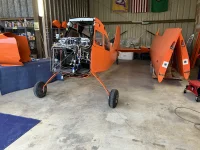
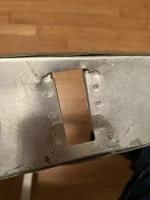
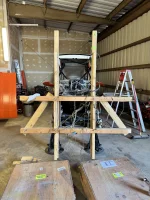
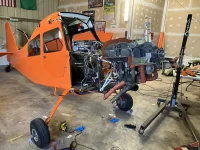
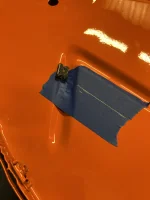
Did a test fit of the engine. Good news is that it looks like after 8 measurements and re-measurements, the fuel shutoff valve bracket is in the right spot. Phew! For the more frustrating bit - the gascolator fitting’s new location ends up being right where a bead was rolled on the firewall. The magnet there marks the approximate location. Talking to my mechanic to figure out a good path forward. I’m thinking cut a big hole and install a stainless patch, mounting the new gascolator fitting to that.
Attachments
is that because you're trying to use the old fuel lines? If so, let your A&P make a few new lines so you can put the gascolator at a better spot. legal, no?
the solid orange looks great!
the solid orange looks great!