You are using an out of date browser. It may not display this or other websites correctly.
You should upgrade or use an alternative browser.
You should upgrade or use an alternative browser.
‘59 7EC Champion rebuild project
- Thread starter MA Cantin
- Start date

MA Cantin
Well-known member
- Joined
- Jul 17, 2018
- Messages
- 103
Time for an update.
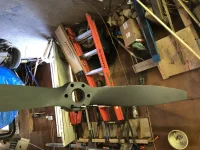
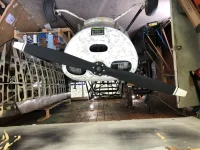
We’ve stripped the prop, inspected, self etching primer and flat black prop paint. We also painted the tips white. It turned out good! I installed it back on and we took the fuselage back in storage. Dad has got the gas strut for the seaplane door mod and started to figure out the installation while I was gone on a family trip last week.
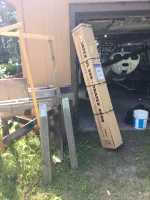
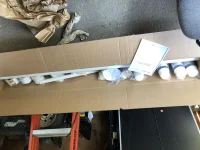
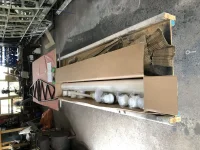
We’ve received the Oratex fabric yesterday!!! Let the fun begin! It is exciting and a bit scary at the same time! (Like so many other steps of this project)
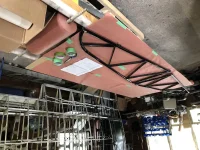
We started getting ready to install the fabric today by adding a 4X8 sheet of plywood to our wing spar table with cardboard and butcher paper on top so we can change the work surface as needed to keep the table clean. The fabric is white so it’ll be important to be clean when we work. We noticed when we did the tombstones that the drops of glue on the table would stick on the finished side especially when we were heating to set the glue. We’ll be starting with the horizontal stabs then the rest of the tail after. Here are a few pics. Its another milestone! Things are coming along!
Cheers!
We’ve stripped the prop, inspected, self etching primer and flat black prop paint. We also painted the tips white. It turned out good! I installed it back on and we took the fuselage back in storage. Dad has got the gas strut for the seaplane door mod and started to figure out the installation while I was gone on a family trip last week.
We’ve received the Oratex fabric yesterday!!! Let the fun begin! It is exciting and a bit scary at the same time! (Like so many other steps of this project)
We started getting ready to install the fabric today by adding a 4X8 sheet of plywood to our wing spar table with cardboard and butcher paper on top so we can change the work surface as needed to keep the table clean. The fabric is white so it’ll be important to be clean when we work. We noticed when we did the tombstones that the drops of glue on the table would stick on the finished side especially when we were heating to set the glue. We’ll be starting with the horizontal stabs then the rest of the tail after. Here are a few pics. Its another milestone! Things are coming along!
Cheers!
Attachments
-
 34BF3F0F-5968-4BC9-9CAB-568F3D9F423A.webp301.8 KB · Views: 52
 -
 AFA4F34F-6F7B-4B5B-9C32-DAD9A296F933.webp161.1 KB · Views: 54
 -
 A67C670C-5993-427F-B678-F473155A3C04.webp254.3 KB · Views: 43
 -
 2602EABC-9CC6-413F-898E-EAE582D8D0C0.webp198.4 KB · Views: 40
 -
 BEA29FA6-AC1A-4747-B4A7-2BB392E524FD.webp169.9 KB · Views: 40
 -
 1B1C8703-B956-4AD6-AE50-C92E9882A727.webp206.5 KB · Views: 50

JimParker256
1965 Champion 7ECA (O-200)
Does Oratex have an STC for the Champion line now? Or did you get a one-time approval from your FSDO? I've been holding off recovering my '65 7ECA to see if they would come through with an STC for our aircraft...
MA Cantin
Well-known member
- Joined
- Jul 17, 2018
- Messages
- 103
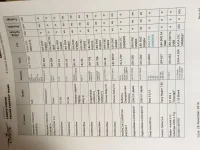
@JimParker256 this Champ is in owner maintenance class here in Canada so we are good with the Oratex. There is an online installation manual with a list of approved aircraft. It is the 2015 version and seems to not include Champs and Citabrias. Good news is when we received the order we also got a 2019 version of the same manual and it has the STC number. Here is a photo of that page in the manual. Let me know if you would like a link to the online manual. Hope this helps!
Cheers!
Cheers!
Attachments
JimParker256
1965 Champion 7ECA (O-200)
@MA Cantin
Thanks for that.
In the document you posted, I can see an EASA STC number for the 7ECA (and other 7-series). I'll check with my IA to see if he'll agree that's good enough, or if I need something else.
But if you don't mind, could you post the link to the online manual? That would be great.
Thanks for that.
In the document you posted, I can see an EASA STC number for the 7ECA (and other 7-series). I'll check with my IA to see if he'll agree that's good enough, or if I need something else.
But if you don't mind, could you post the link to the online manual? That would be great.
MA Cantin
Well-known member
- Joined
- Jul 17, 2018
- Messages
- 103
Not at all @JimParker256 ! Here it is...
https://www.oracover.de/downloads2/...anual-AirplaneMaintenanceManualSupplement.pdf
https://www.oracover.de/downloads2/...anual-AirplaneMaintenanceManualSupplement.pdf
MA Cantin
Well-known member
- Joined
- Jul 17, 2018
- Messages
- 103
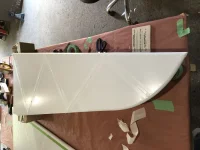
We’ve got both stabilizer covered. We’ve got finishing tape on both sides over the re-enforcing tape and rivets. Still some tapes to do around some edges. We’re getting better with the Oratex! The best is to see the fabric shrink after the edges are glued. Here is a pic of the stab with tapes and a video of the process.
Cheers!
Cheers!
Attachments

is Oratex the pre-colored covering stuff? looks awesome!
MA Cantin
Well-known member
- Joined
- Jul 17, 2018
- Messages
- 103
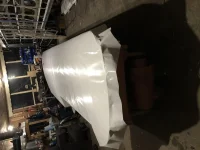
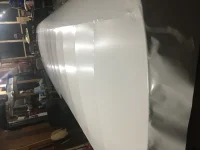
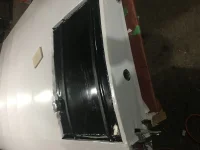
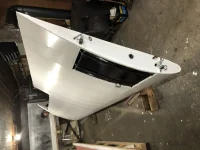
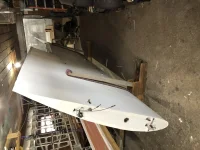
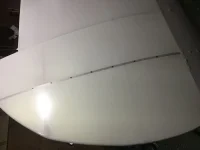
Hey folks! It’s been a while since the last update. Things are moving along with the project as we’ve just finished covering both sides of the right wing. The tail pieces and ailerons are covered as well. Dad just finished riveting the first rib. We’ve been having fun with the Oratex. It’s challenging to install around curves. Being new to every step we’re learning a lot! Sometimes I wonder how it would be to cover using a conventional system. Would it have been harder for me to learn to spray with a nice finish than to learn how to heat shrink the fabric around curves without any wrinkles? Lol! Anyway, awesome experience no matter what. Not to mention the time spent working with my Dad.
Here are a few pics of our progress.
The 2 first ones are before and after shrinking.
We put the wing in the vertical racks to shine a light behind it to find the rivet holes.
Cheers everyone!
Here are a few pics of our progress.
The 2 first ones are before and after shrinking.
We put the wing in the vertical racks to shine a light behind it to find the rivet holes.
Cheers everyone!
Attachments
-
 78997D79-69CD-4703-880F-734425E9BDFC.webp105.9 KB · Views: 39
 -
 0E733441-B783-406A-8208-2E9540DA2B4A.webp58.8 KB · Views: 41
 -
 4B77037C-C554-4C4B-A302-29335A2C7843.webp66.2 KB · Views: 39
 -
 830D8E96-7E26-4364-9160-4BBB7DE85EF6.webp115.7 KB · Views: 40
 -
 F31EF381-CE5C-4196-B0AD-C6B39E6927D1.webp160.9 KB · Views: 40
 -
 9CBC0661-16A8-430F-8A1B-E4A3ED543B3E.webp25.6 KB · Views: 50
Looks great, progress just feels good! lol
How do you add trim colors? Spray or just lay on more of the oratex?
How do you add trim colors? Spray or just lay on more of the oratex?
MA Cantin
Well-known member
- Joined
- Jul 17, 2018
- Messages
- 103
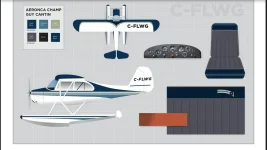
Thanks @Bartman! We will probably go with stickers but Oratex us fully paintable. They also sell paint and rolls of different colour sticker stuff in different widths. More variety of colours with the trim than the actual Oratex but in theory, we could put more Oratex. I want to say it is vinyl but not sure what it is. Oracolour and Oratrim are the names if I remember correctly. We will probs go and see a local car wrap shop. My uncle made us a design on a vector based program so dimensions and proportions should be accurate. Hoping to find a local shop that has a plotter for the trim. We may get the install done as well. We have not went to deep into that part yet though. Lol!
MA Cantin
Well-known member
- Joined
- Jul 17, 2018
- Messages
- 103
Very classy, should look beautiful. 

How easy is it to get materials from Oratex?Thanks @Bartman! We will probably go with stickers but Oratex us fully paintable. They also sell paint and rolls of different colour sticker stuff in different widths. More variety of colours with the trim than the actual Oratex but in theory, we could put more Oratex. I want to say it is vinyl but not sure what it is. Oracolour and Oratrim are the names if I remember correctly. We will probs go and see a local car wrap shop. My uncle made us a design on a vector based program so dimensions and proportions should be accurate. Hoping to find a local shop that has a plotter for the trim. We may get the install done as well. We have not went to deep into that part yet though. Lol!
Thanks, what are you planning to do for the throttle and trim quadrant covers? My 76 Scout has new seats, panel and electrical but the folks I bought it from stopped there. I am putting in Rainbows’ baggage door, the ACA extended baggage kit and middle and front carbon fiber floor boards (old carpet and wood are past their prime). I will have to replace the right side and rear interior panels for the baggage door so I thought I would replace all the side panels but I am left with nice wood grained plastic covers which are a bit dated. I could always paint them but I saw a Scout for sale with carbon fiber covers but I can’t find anyone who sells those parts. Any tips would be helpful.
MA Cantin
Well-known member
- Joined
- Jul 17, 2018
- Messages
- 103
Hi folks!
It’s been a while. I took @Bartman ’s advice from another thread and go for it! Lol! Time for an update.
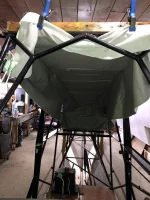
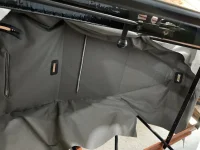
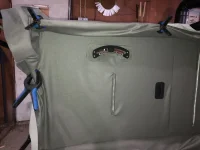
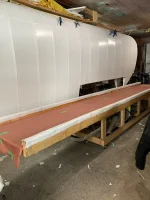
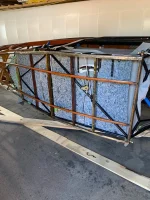
Both wings are covered complete with finishing tapes. We Brought the fuselage back in the garage and put it back on the rotisserie. We partially installed the headliner. Dad put some insulation behind the headliner. Then we did the fabric on the belly. We are now doing the fabric on the right side. This past weekend, we cut out the openings for the rear window and door. That was great visual progress. With that rounded rear window cut out, it was looking more like a Champ again! I did a lot of shrinking tonight. I’d say we’re about 75% done the first pass with the heat gun. It’s always awesome to watch the Oratex take it’s shape and see all the wrinkles come out! It can be tricky stuff to work with in curves but once it’s on, you’re done!
So, things are still progressing. Dad’s in there everyday plugging away at it and I usually go one night a week and a day on the weekend.
Here are a few pics.
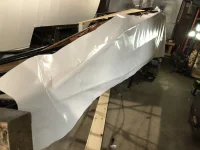
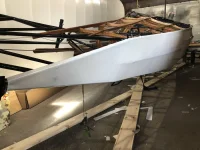
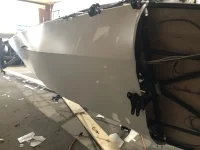
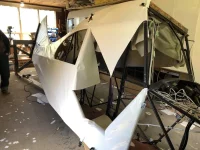
Cheers!
It’s been a while. I took @Bartman ’s advice from another thread and go for it! Lol! Time for an update.
Both wings are covered complete with finishing tapes. We Brought the fuselage back in the garage and put it back on the rotisserie. We partially installed the headliner. Dad put some insulation behind the headliner. Then we did the fabric on the belly. We are now doing the fabric on the right side. This past weekend, we cut out the openings for the rear window and door. That was great visual progress. With that rounded rear window cut out, it was looking more like a Champ again! I did a lot of shrinking tonight. I’d say we’re about 75% done the first pass with the heat gun. It’s always awesome to watch the Oratex take it’s shape and see all the wrinkles come out! It can be tricky stuff to work with in curves but once it’s on, you’re done!
So, things are still progressing. Dad’s in there everyday plugging away at it and I usually go one night a week and a day on the weekend.
Here are a few pics.
Cheers!
Last edited by a moderator: