'68 Citabria 7ECA Milman Spar Conversion

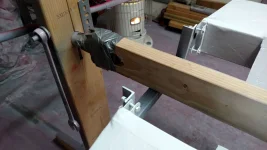
So the last couple of months have been hectic. The plane project has been moving along but I'm a little freaked out that (a.) I'm over a year into it and just getting the second wing done (b.) the new wings make the old fuselage look like hell (c.) I got a price to prep/paint the fuselage and it was around $8000. With few options and a reluctance to assemble the plane without painting the fuselage I've decided to go ahead and bring the fuselage home, maybe as soon as next week so it can be taken care of before we put the wings back on and put the airplane in for an annual inspection. The second wing needs 24 hours to cure before I can trailer it and leave it standing on its nose in the hangar. That leaves me with tomorrow to go remove the horizontal stabilizer so it can be prepped and painted after the ailerons which are next in line.

there's a primal scream somewhere in my near future. :LOL::LOL::LOL: this has all bee fun but I've got a lot of other stuff to get to!! lol
 
It all sounds veeeery familiar! It’s why I ended up with a new headliner, then new side panels, then new seats, then carpet, then tires, repainting the panel, and the list never ends. You’ll be happier with fresh paint on the entire plane, and would up the value probably more than you think.

Does your system have any type of rejuvenator? Poly fiber has it and while people will say it’s bad, I like it. It adds the solvents and plasticizers back into the poly brush, poly spray, and poly tone that dry out over the years. So for someone repainting an airplane, it’s one of those “can’t hurt” things to do.

Red looks amazing!
 
the red is very vibrant! it's amazing how much pigment it has in it, the slightest little smudge seems to bleed and smear and stay put after so much wiping. The poly fiber on the fuselage is just tired looking compared to that snazzy red and bright white. I was only going to add scallops to the tail but now the belly needs attention and the gear should be painted too so we're bringing the whole shebang home to get the treatment. My wife knows I'm trying to get it done so she's tolerating the delay in getting to other household projects but when the plane is done I've got a lot of stuff to do for her and she's not the forgiving type!!!! lol

it'll be nice though, so there's that. :)
 
Struts have been cleaned, scuffed, and spot primed so paint will be going on in the morning.
IMG_20190114_160543900.webp

Ailerons were done this past week using my wing rack to hold them up. I am not a big believer in sophisticated jigs, in this case a 2x4, some zip ties and duct tape, and some scrap 1" angle
IMG_20190112_160543286.webpIMG_20190112_183415325.webpIMG_20190112_183426272.webp
 

Attachments

  • IMG_20190112_183415325.webp
    IMG_20190112_183415325.webp
    77.9 KB · Views: 3
  • IMG_20190112_160543286.webp
    IMG_20190112_160543286.webp
    76.4 KB · Views: 3
As I am learning help me along I have been trying to compile a list of supplies that will be needed did you get the sleeves for the wings or did you use sheets of fabric? Now I also see you look like your just going to freshen up the finish on the body are you planning on covering the original with the strew art system or going to rip it down to frame and start with all new material? Last item it looks like you are in the finish stages and I am about to start any left over materials and if so do we have a swap and shop section? Looking good bet your chomping at the bit ready to go fly.
 
We believe you.

Wow, was that $8 grand just to shoot a coat of paint?

About $8,000 to remove the horizontal stab, prep/repair a few spots on the belly, sand the fuselage stripes and N numbers off, mask/scuff and spray the base and trim.

The latest plan is to finish up the small pieces, rehab and paint the cowl parts, clean/scuff and paint/trim the horizontal stab, and then do the fuselage in April after I'm done with training for work. I keep going back and forth between having someone else do the fuselage and doing it myself. My concern is never getting it done and possibly doing a shi*ty job in my cold garage. Waiting a few months might help the paint dry faster with fewer runs if the temp is warmer. It's coming out pretty nice so far, I'll probably change my mind a few more times in the next couple of months.
 
As I am learning help me along I have been trying to compile a list of supplies that will be needed did you get the sleeves for the wings or did you use sheets of fabric? Now I also see you look like your just going to freshen up the finish on the body are you planning on covering the original with the strew art system or going to rip it down to frame and start with all new material? Last item it looks like you are in the finish stages and I am about to start any left over materials and if so do we have a swap and shop section? Looking good bet your chomping at the bit ready to go fly.

I didn't do the fabric, I was going to but was so far behind and a local fabric guy had time so I let him do it for me. We used fabric on a roll, not sleeves.

The fuselage is going to be sprayed over the existing paint with Stewart System EkoPoly. It seems to cover really well, we'll see in ten years how well it stuck, hopefully more! It's a matter of cleaning the existing paint really well with Stewart's EkoClean degreaser, then scuffing with 320 grit paper and red scotchbrite pads, cleaning some more with tack rags and maybe isopropyl alcohol on dust-free rags, and then painting.

Probably no leftover materials over here. I have some fabric, not sure how much, and some leftover adhesive but not enough to do much. I might donate them to the local aviation club at the airport.

My only advice, except ask a lot of questions before you make a decision, is to buy extra paint to practice spraying on some plywood or something if you've never painted before. I tried to learn with the filler coat, EkoFill, and then put down the primer pretty well but my paint could be better, IMHO. It looks awesome but no Grand Champion awards for me I'm afraid!
 
I have seen drop-dead gorgeous test panels of Stewarts, but so far not a completed airplane that had a glossy finish comparable to Aerothane or polished butyrate.

Eight grand seems outta line -ten grand ought to get new cover on a fuselage. Could you haul it to an auto body shop?
 
Understand the donating leftovers to local club, as for my experience I am an A&P and have painted a few planes the last time I did fabric was in school. So I am looking forward to this as a project and not a mission. Best part is I have a Warrior to feed my need to fly during process. Keep working towards the goal I'm looking forward to finished product.
 
Little did I know how my quick and dirty wing rotisserie would convert to holding the ailerons and now the struts.

FWIW, 1 1/4 OD tubing fits snugly into the hole in the fiberglass wingtips for support on the outboard end and that tubing slides over 3/4" black pipe which is what I used. More 1 1/4 OD galvanized fence post pipe is used for the lower end of the strut support here

IMG_20190115_212633403.webp

The other end with some 5/8 square tubing (leftover from a since abandoned Skybolt project, it was for the stick to stick attach rod) extends the fwd upper strut attach to the support bracket
IMG_20190115_212655986.webp

All jigged up and ready for paint
IMG_20190115_212626315.webp
 
Last edited:
My IA said to try not to separate them. :unsure::unsure::unsure:

I thought I would be saving time by keeping the rigging original. It was so far off and wasted a lot of time on it. I wish I had just zeroed it out from the beginning. The wings came 100% apart, evening the trammeling effects the final rigging
 
I added a 3/8" od bushing over the 1/4" bolt at the lower strut attach point so the bolt won't bear on the fitting in a destructive fashion as the struts are being rotated.

Maybe what I'll do is wrap a quarter inch strip of tape around the base of the jam nut (at the adjustment point of the bottom of the aft strut) so there will be some relatively clean threads if the strut has to be shortened. If it all goes together without much drama I can always do touch ups with a small brush.

162 mph VNE? I have no idea! I suppose it marked on the airspeed indicator but I haven't seen the airspeed indicator in over a year! :cry: Is 162 mph VNE good or bad? I did pick up a set of fairings/mittens for the top/front attach points so there's that!
 
Last edited:
Back
Top