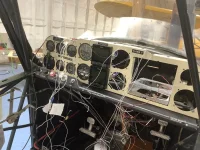
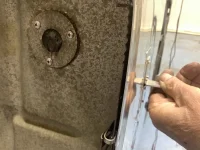
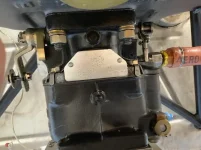
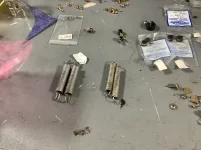
what is that gray plastic hub fixture? vacuum?
You are using an out of date browser. It may not display this or other websites correctly.
You should upgrade or use an alternative browser.
You should upgrade or use an alternative browser.
New project N163Y 7GCBC 1978
- Thread starter Bruce
- Start date
Bruce
Well-known member
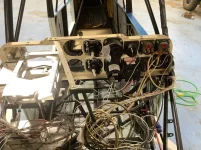
That is how the nu lights work, just a lot of ugly when you look at all wires going everywhere.
Bruce
Well-known member
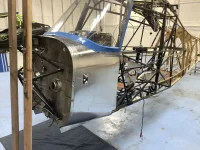
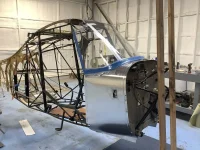
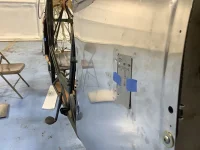
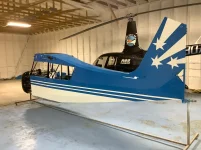
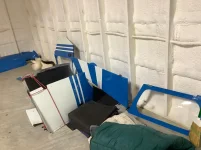
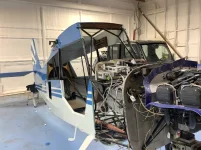
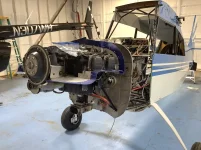
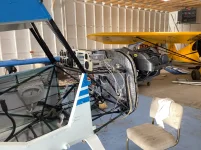
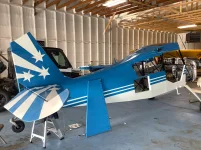
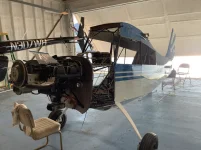
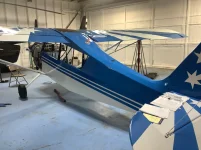
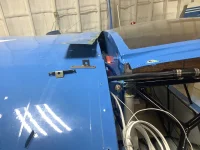
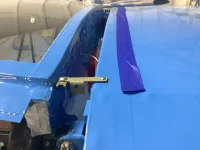
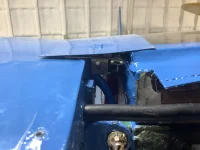
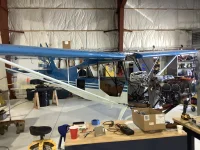
So back to where I can start fitting parts. Somewhat less than happy, first boot cowel not bad but the vent doors don’t appear correct, if you look at pictures you can see where there riveted together it is bowed out. I took a shot holding them with hing on out side and they fit great but installed correctly not very pretty I’ll talk with Chad in morning. Then the belly pan the center holes line up but that’s it, guess I’ll get a new one this one is kinda mangled. Baggage door not to bad but I need second set of hands to line things up. And last fittings the windshield might just replace the wrap around as well it looks tired depending on the money. I ordered a thermal UV gray and somehow received a clear. I’ll say LP Arrow was great customer service correct one on the way no hassle! Once everything is fitted then on to installing new GNC 355 wire it to the G5s then fabric new cables to arrive any day. Seems slow but I’m sure next week things will start to fall in place.
Attachments
-
 IMG_2306.webp236.5 KB · Views: 69
 -
 IMG_2307.webp228.7 KB · Views: 48
 -
 IMG_2308.webp263.1 KB · Views: 42
 -
 IMG_2309.webp247.6 KB · Views: 41
 -
 IMG_2310.webp143.5 KB · Views: 42
 -
 IMG_2311.webp133.8 KB · Views: 42
 -
 IMG_2312.webp117.3 KB · Views: 43
 -
 IMG_2313.webp144.3 KB · Views: 41
 -
 IMG_2314.webp93.1 KB · Views: 38
 -
 IMG_2315.webp137 KB · Views: 40
 -
 IMG_2316.webp169 KB · Views: 40
Bruce
Well-known member


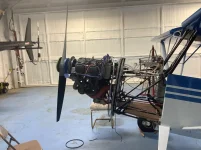
Another day of chasing wires and planning radio rack, then fit, and then move again.
Desert7GCBC
Well-known member
These photos over the last few months are priceless! I've learned a lot of valuable stuff about my aircraft.
Thank you, Bruce!
Paul
Thank you, Bruce!
Paul
Bruce
Well-known member


Bruce
Well-known member

Bruce
Well-known member
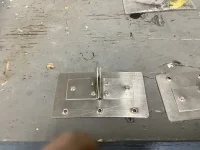
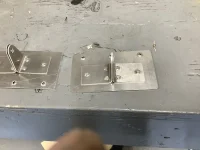
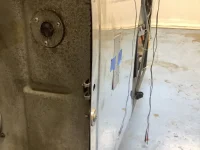
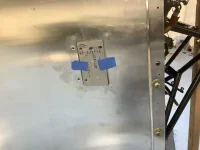
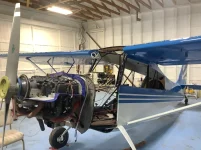
Making some headway, so slow after a year apart, ordered what I hope is last missing hardware.
Attachments
-
 IMG_2430.webp133.9 KB · Views: 16
 -
 IMG_2444.webp161.6 KB · Views: 24
 -
 IMG_2443.webp176.8 KB · Views: 21
 -
 IMG_2442.webp209.1 KB · Views: 19
 -
 IMG_2441.webp210.3 KB · Views: 16
 -
 IMG_2440.webp176.1 KB · Views: 14
 -
 IMG_2438.webp157.2 KB · Views: 14
 -
 IMG_2432.webp205.7 KB · Views: 17
 -
 IMG_2431.webp215.5 KB · Views: 17
Bruce
Well-known member
Well some progress, but where did I find the Torq numbers for the wing attachment wait? This one was converted to aluminum spars no wonder the bolts don’t fit by Manuel. Wonder if the Torq changed? I’ve called ACA but it was the end of there day so back at it tomorrow.
Attachments
Bruce
Well-known member
Progress is slow with almost no visible signs but moving forward and starting to run low on parts, that’s a good sign. Question for all you that have done this the last picture shows springs, I Kano the ones on left are for rudder to tail wheel I have the springs in for the flaps what are the other 2 for?
Attachments
Bruce
Well-known member
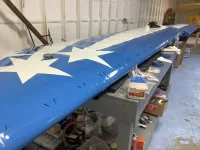
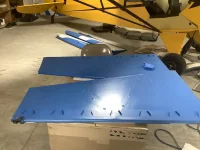
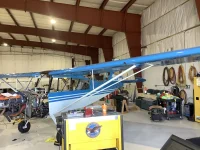
Well finally got back to Wyoming hope to finish and fly this summer, not much visual progress, have primer lines run, engine is about wrapped up started looking at wing to attaching the wing root gearing’s and can’t rember where the leading edge screw mount goes anyone have a good photo of this?
Attachments
put a screw through it and into the tab on the underside of the fairing. Lay the fairing in place and wherever the holes in the bracket line up, that's where it goes. the bracket won't be tight to the tab on the fairing. don't have a picture, sorry
Bruce
Well-known member
Bruce
Well-known member
Looking for a little help, I see that there is a section on manual, but I’ve not been able to find an electronic copy of the shop manual for the 1978 GCBC. Both my parts and my shop manual have disappeared from the hanger where I left it last year in Wyoming. Would anybody have an electronic copy of the shop manual? I thought I would just buy a replacement but the price on the manuals, reasonable, the freight is killer according to the webpage Unvair freight is $80 for a 30 book.
Bob Turner
Well-known member
- Joined
- Apr 4, 2018
- Messages
- 4,135
Call them. I am sure shipping is closer to ten bucks.
Bruce
Well-known member
I also see spruce seems to have the same Manuel and might have an order going out from my shop out here which might Handel the freight, that said I’m a little miffed how the books disappeared. But life goes on.
Bruce
Well-known member
You made me look back at what I wrote, it makes a lot of sense that they only did the exhaust valves and guides may be at the overall. I’m really hoping to have this thing ready to run in the next two weeks all the wiring done and parts fitted. The interior is supposed to be started first of June. I was trying to have it ready to fly to Oshkosh. But that’s looking a little iffy if I don’t have time to break in the engine. Don’t think I wanna do a long cross country on a fresh engine. But I’m going to Oshkosh one way or the other this year hope to see you guys there.!
Bruce
Well-known member
Nuchatlitz
Well-known member
Installing your wing root fairings, is it an option to just screw them to the inner wing rib, like new ones are done? The “tensioning” of the old system always seems inadequate, and I like the wider rubber seal of the new style.