Bruce 79 ECA recover

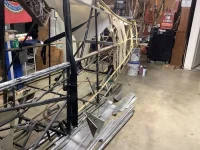
I converted to aluminum gear, and do not remember cutting fabric for the center bolts. They are longer for the aluminum legs.

Consider bars instead of U bolts. And seriously consider the NAS bolts for the inner bolt. The AN bolts have to be checked fairly often. I used NAS bolts all around, but that was when Genuine was able to get them for $20-30 bucks each.

Bob, you bought the gear direct from ACA? Do the aluminum gear legs bolt up directly to the steel gear mounting points? I thought those inner bolts could only be the higher strength ones?
 
That is a lot of questions. ACA has a service bulletin and some drawings covering the conversion.

The gear legs themselves are, with longer bolts, a bolt-on. The fabric support, where the legs come out, requires some welding. At the time, price of the kit from ACA was $6500 or so. The bolts alone were as high as $130 each.

The brake lines are slightly different.

No, the stock gear can still use AN-7 bolts and U bolts. The aluminum requires six NAS bolts and not U-bolts.

the way I see it, if you stay with steel legs, best to ditch the U bolts and replace with a bar. AN-7 bolts on the bar would be way stronger than the U bolt. I would replace both inner bolts with NAS. If you shop around, these bolts can be had for lots less than the ACA price. Use the correct head washers!

Does that help?
 
Good morning to all! I am about ready to start back on my recover after the break for some recovery time from Rotator cuff surgery (not a fun process) but as I am recovering I am starting to strip the old paint from metal and fiberglass parts waiting for just a little warmer weather. I am using the Stewart's stripper which works better than I expected for water based product.

This being said I was hoping some of you have more experience at this than I have, some do not those are welcome to add opinions as well. I am trying to make a list of what needs to be done in which order. Originally I did not plan on replacing the headliner but this changed and if I understand this it is much easier to replace before the fabric is installed and painted. Which makes you consider the seat belts factory or Hooker's. So as you can see one decision could change the process order ( or just add more to the job as you go along.)

What I am looking for is a progressive order of assembly like when will the windshield go in (again original plane was use the one I removed but now looks like it will be thermal gray) and so on. Looks like the windshield needs to be installed as well as boot cowel before base color I have noticed another thread on a different site where the plane was painted without headliner installed or windshield, seeking some help in these areas. I was hoping for some conversations with others at Sun and Fun, this may still happening May if the virus settles down. The other thing is I have had time for some parts research. Like the Fire wall, I called ACA and was priced one for $1650.00 after shock wore off was told this was an assembly and started searching after market. Well Spruce offers one for around $80.00 so I called both and asked for some details, ACA quoted a bare fire wall for $495.00 Still considerably higher than Spruce turned out the one from Spruce is steel, aluminum, The one from ACA is stainless well for me ACA gets the sale for a better product in my opinion.

Looking forward to any response and wishing all to be healthy. As I formulate the plane I will list it as it progresses.
 
I have never recovered a Champ. I would finish all spray painting before assembly and before windows.

For the first time this fall I used a wing rotator - if you are by yourself it is a must! I have struggled for a half century with sawhorses and a helper. No more. I did have to buy steel to hook the two parts together, make some plywood guides for the hoop, and install wheels - but it was worth every penny someone else spent.

I may never recover a Champ. The guy who did my Dec in 1992 was so good it still looks brand new! Butyrate finish - it glows! It has a couple cracks in the usual places; I am ignoring them.
 
I made a Rotator and your correct the first wing I did 1/2 before making this.
What I am in process of is the fuselage, first the landing gear if you install before the fabric will not rotate, so I have devised a plan for access to install the bolts after fabric, so far I think the order will be
Bulk heads,
headliner,
fabric covering,
floor boards,
seal fabric-(silver)
fire wall, engine,
Boot cowel,
Windshield, windows,
then base color of aircraft,
landing gear brakes tires,
stripe fuselage

as I bounce this around I realized the boot cowel has to be in place for windshield which is riveted in place so must be painted with it installed, the side windows need to be in place so the over spry won't ruin the new headliner. hopefully some planning will save time and frustration. Like I said I am hoping those that have done this will jump in and add to the list.
 
Call Rainbow Ron. He recovers these planes and is very helpful. Headliner is a lot easier prior to recover. Also the seatbelt shoulder strap attach point tabs, both in the front and rear should be installed prior to headliner.
 
Doesn't the windshield just slide in behind that riveted fairing on the boot cowl? I didn't have to remove mine but I assumed it wasn't actually attached to the boot cowl.
 
I think you could put the windshield in separately but as you can see by the photos I have attached when this one was put in the bottom wraparound the windshield was put on after the installation of the windshield because all the tape is under the rivets. So like I said I’m trying to decide how to reassemble this the easiest way possible.
 

Attachments

  • 3977E74C-5110-45F0-9F2F-8F4D20657342.webp
    3977E74C-5110-45F0-9F2F-8F4D20657342.webp
    164.1 KB · Views: 40
  • D606D971-91BE-40E9-9B73-116F9A0FF2A7.webp
    D606D971-91BE-40E9-9B73-116F9A0FF2A7.webp
    97.8 KB · Views: 40
  • 025F2770-AA97-431C-A586-F74F7653C363.webp
    025F2770-AA97-431C-A586-F74F7653C363.webp
    266.6 KB · Views: 34
  • 368D6231-D349-46BB-AA71-C1556D36D4E1.webp
    368D6231-D349-46BB-AA71-C1556D36D4E1.webp
    98 KB · Views: 39
Good Easter to all, I am hoping to get back at the project. I have been striping and sanding inspecting, Yesterday I spent the day making a paint booth because I want to start priming next week, weather depending. Seems we have days in the 80 then back to 40, I am still searching insulation options for the back of the fire wall, and boot cowl everytime I think of the factory stuff I am sure there is something better out there. Putting my shopping list for parts together and soon as I get frame in paint the headliner goes in then I should pick up speed on this project.
 
My A&P used a thin black high density rubber/foam material along the insides of the boot cowl. Very clean looking. I'll post a picture.
 
Any chance you can find the supplier or name of product? And the picture will be great I am sure there is something better than that factory foam.
 
I don’t know the name of the product but I will get it next week
 

Attachments

  • 8D0139B2-520C-4BC9-90E1-42A40B2C8D99.webp
    8D0139B2-520C-4BC9-90E1-42A40B2C8D99.webp
    85.6 KB · Views: 41
Thought I would update this, Had to take a little time off, then for the last few months I was able to strip some paint get the frame cleaned up, and my IA inspect the airframe everything looks good.Then I put together a parts list I needed floorboards bulk heads, firewall, and so on. So this looks like a good excuse for a flight to Wisconsin which I took on the 15th. Went to ACA very nice operation and friendly folks. Now I understand why they call Chicago the Windy City. Good crosswind practice if you want to call that practice. Now on to pulling the headliner, One more cleaning of the airframe then I can start priming things and more fabric work. A little closer every day.
 

Attachments

  • BA4817EC-C8F7-4183-9CED-D4A16FC19A89.webp
    BA4817EC-C8F7-4183-9CED-D4A16FC19A89.webp
    228.7 KB · Views: 34
  • 65840F54-A116-4CE4-9FB1-27BA9858CEE6.webp
    65840F54-A116-4CE4-9FB1-27BA9858CEE6.webp
    155.3 KB · Views: 28
  • BC707197-32BD-4252-8EC7-5DCD201C7249.webp
    BC707197-32BD-4252-8EC7-5DCD201C7249.webp
    243.2 KB · Views: 28
  • 7D0A1FD3-7F48-4CEB-BE4B-C7A4D2C113ED.webp
    7D0A1FD3-7F48-4CEB-BE4B-C7A4D2C113ED.webp
    200.8 KB · Views: 28
  • 5B06B46E-2E5F-47F3-B13F-514FC2AE3047.webp
    5B06B46E-2E5F-47F3-B13F-514FC2AE3047.webp
    87.3 KB · Views: 28
  • ABD44B1D-9747-4B50-9AEA-EC6AAB89A051.webp
    ABD44B1D-9747-4B50-9AEA-EC6AAB89A051.webp
    118.6 KB · Views: 39
Trying to get all the parts ready for primmer before I start spraying. There’s a lot of cleaning and preparation but once I get past this point I believe the process will speed up considerably assuming I don’t keep missing things that are needed.
 
that's one of the hardest parts of doing it yourself, trying to do what you're doing while also managing preparations for the next step so you're not constantly being delayed a week here, a few days there, waiting on parts or supplies. a little each day and it gets done.

(y)
 
Thought I would add some to the adventure of the build. I hope to have frame in primer and then continue with re assembly, but I keep hitting snags so not trying to be to boaring when I installed the new bulkheads I realized the guides for the trim tab cable were not installed so I ended up calling back to ACA when I received them I went to install them and found out you need a tool to install them, they sent me a drawing so I will need to make this or borrow one if some one has already done this. Let me share some pictures. First one is the tool drawing, second is where they go, third is the before install and one I removed from old bulkhead, last is how they made the tool with vise grips. If I would have know this I would have asked for them to install these before I left there shop. Just a little more delay. Hope some one else doesn’t make same mistake I have.
 

Attachments

  • 98B9AF9E-D66B-409F-8E6F-1ABE7030AE76.webp
    98B9AF9E-D66B-409F-8E6F-1ABE7030AE76.webp
    341.6 KB · Views: 40
  • C7BCD114-0788-4DA7-9DD0-9992DF310A8F.webp
    C7BCD114-0788-4DA7-9DD0-9992DF310A8F.webp
    110.9 KB · Views: 38
  • 3874FC52-55A5-4E3C-BE40-606AF780ED1D.webp
    3874FC52-55A5-4E3C-BE40-606AF780ED1D.webp
    77.2 KB · Views: 38
  • A23A6788-CF52-4520-9DE0-F6F95F4639C6.webp
    A23A6788-CF52-4520-9DE0-F6F95F4639C6.webp
    146.7 KB · Views: 32
  • 8B53A6F7-7689-4536-8569-A35967DD05F5.webp
    8B53A6F7-7689-4536-8569-A35967DD05F5.webp
    304.6 KB · Views: 29
Back
Top