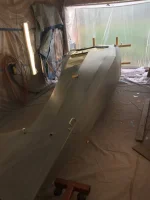
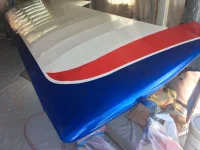
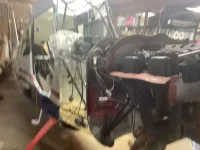
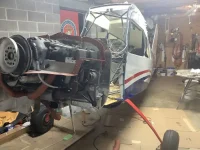
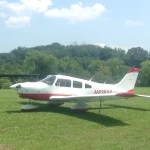
Bruce 79 ECA recover

I've done lots of installs of plexiglass in airplanes and I second using the proper bit(s).
Also after drilling I use a dremel tool with a fine cone-shaped stone to chamfer the holes to prevent future cracks. When mounting; just snug the screws up, plexi grows when it heats up so you want to leave some room to grow.
Chris
 
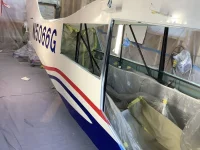
Thought I would through this out there, I ordered Solar gray skylight and windshield, part number 192SG 288SG and if you look at the picture you can see my old skylight how much darker it was and what I received is not what I was expecting. More than likely I miss something on what to ask for and how dark I could order it, but for future reference for anybody else if you want it darker pay attention what you’re ordering.

Next can anybody tell me what they used to put the windshield in for the bottom seal? Thanks
 

Attachments

  • 1E73A573-7419-4F6E-B573-B18F6FC713FA.webp
    1E73A573-7419-4F6E-B573-B18F6FC713FA.webp
    164.7 KB · Views: 60
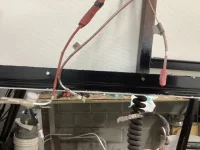
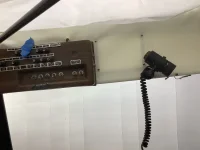
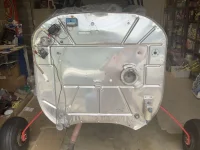
As I slowly move along fitting the envelope I’m trying to make sure I connect all the wires that are needed to before I close up the wing roots but I don’t remember where these wires go would anybody know? I have a wiring diagram and numbers on the wires but no numbers on the wire but not listed in the book. I’m thinking they go behind the fuel site and connect the ground wire is easy to accommodate.
 

Attachments

  • 5C76CAD8-1172-4622-AA0F-13D1C36FBBED.webp
    5C76CAD8-1172-4622-AA0F-13D1C36FBBED.webp
    176.7 KB · Views: 58
  • 8D110FE3-6A95-4B29-9ECF-9B60817D8A7A.webp
    8D110FE3-6A95-4B29-9ECF-9B60817D8A7A.webp
    109.4 KB · Views: 48
  • 8514CE5B-38C4-4207-B6F0-0CDDB8958959.webp
    8514CE5B-38C4-4207-B6F0-0CDDB8958959.webp
    222.4 KB · Views: 45
  • E984DBB0-C8C9-4064-85A3-A079520204FD.webp
    E984DBB0-C8C9-4064-85A3-A079520204FD.webp
    58.7 KB · Views: 48
  • image.webp
    image.webp
    296.8 KB · Views: 48
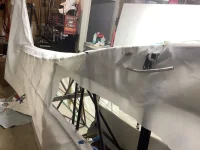
Ready to do some iron work slow and steady, looking forward to some warmer weather.
 

Attachments

  • 0A700D89-4F53-4644-8D9B-DBD52F18B7E5.webp
    0A700D89-4F53-4644-8D9B-DBD52F18B7E5.webp
    98.6 KB · Views: 40
  • 24EAC415-5C46-4E53-A8AA-542CEE93E179.webp
    24EAC415-5C46-4E53-A8AA-542CEE93E179.webp
    114 KB · Views: 44
Looks like you figured out where to put those wires. Presumably they are nav and strobe light wires and will connect to the wing wires up towards the nose rib.
 
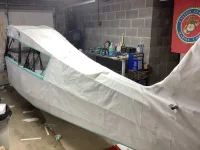
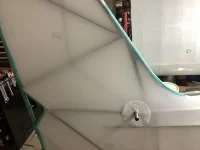
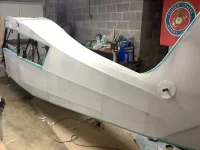
Looks so much better shrunk down, tomorrow I’ll install the skylight. At this rate I’ll be ready for paint when it warms up.
 

Attachments

  • 9B6E26E4-DBB3-4591-A49E-D4E1E4AB537F.webp
    9B6E26E4-DBB3-4591-A49E-D4E1E4AB537F.webp
    44.9 KB · Views: 41
  • 24909D91-9E77-4A15-AAB9-1C7127B86BF0.webp
    24909D91-9E77-4A15-AAB9-1C7127B86BF0.webp
    88.5 KB · Views: 38
  • 722E3287-4EB6-4444-A083-65B118FEF42C.webp
    722E3287-4EB6-4444-A083-65B118FEF42C.webp
    116 KB · Views: 33
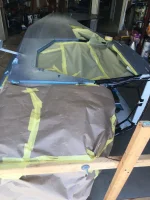
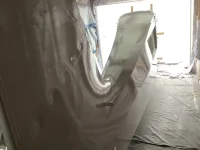
A little more done and seems like a lot farther to go.
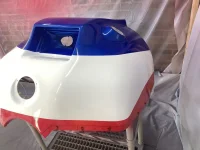
But there is color 😁 next to let paint cure a week then layout some stripes and N number.
 

Attachments

  • 381A3E44-9B88-4CFE-A0C6-64D2073E2BB3.webp
    381A3E44-9B88-4CFE-A0C6-64D2073E2BB3.webp
    138 KB · Views: 33
  • 7481FF13-7C49-40FA-9DE7-69B77C7C8C1E.webp
    7481FF13-7C49-40FA-9DE7-69B77C7C8C1E.webp
    122.9 KB · Views: 34
  • 5C22F05D-5715-4362-A34E-905CF2EBE9CC.webp
    5C22F05D-5715-4362-A34E-905CF2EBE9CC.webp
    120.7 KB · Views: 37
  • 0217E734-791A-4B6D-ADD4-0E6EA6B346BF.webp
    0217E734-791A-4B6D-ADD4-0E6EA6B346BF.webp
    85.1 KB · Views: 38
  • 70D05111-948F-4C3A-A9DE-D58CC2FD0417.webp
    70D05111-948F-4C3A-A9DE-D58CC2FD0417.webp
    101.9 KB · Views: 44
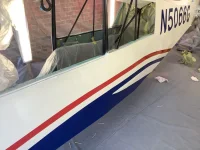
Well this took a lot longer than I thought it would, seemed to take forever to stripe and number, there not perfect but for me they look good not sure how the pros do it. I’m off to Wy for a couple of weeks then I can start putting some parts back on . Still have to paint one wing and a lot of small parts.
 

Attachments

  • image.webp
    image.webp
    122.5 KB · Views: 47
  • image.webp
    image.webp
    149.3 KB · Views: 49
Wow, you really made quick progress on that fuselage. Yours is much nicer than mine. Jealous!

I saw a while back you were asking about what to put the bottom of the windshield in. I spent the last 2 days cursing my ancestors for spawning me, because I was trying to fit the boot cowl back on, so I have spent some time looking at mine. There appears to be a V-shaped rubber channel that the bottom edge of the windshield sits in, and which sits in the groove formed by the top edge of the boot cowl and the fairing that is riveted to the boot cowl to overlap the windscreen. My rubber channel appears to be mostly dust, and someone has repaired it by pulling off the panel glare shield and applying an enormous glob of clear silicone sealant to the inside bottom edge of the plexiglass. Something else to fix when I get the time.

Anyhow, the real answer to your question is the same as for all other questions: Call Chad at ACA, find out the part, and order it from him.
 
Ever get to a point and think why did I start this? Or what have I done? Now to clean up make my wish list and see what Santa brings me.🤡
thanks for the photos Bruce. I keep coming back to these project threads as I try to move things along just to make sure I'm not about to make a major mistake!
 
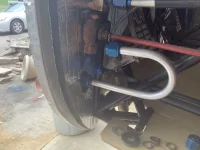
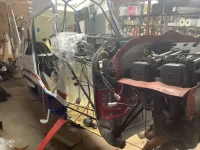
Doing a test fit I have a problem in my fuel line curious if anybody else is run into this. Just some creative plumbing needs to happen. What I did was move the fuel sump from the center of the firewall to the left-hand side like newer models.
 

Attachments

  • 81E26D06-DEBA-427E-901D-18E251FF6020.webp
    81E26D06-DEBA-427E-901D-18E251FF6020.webp
    132.9 KB · Views: 40
  • 4B27225E-0B76-44DD-9CE8-FD16D1DCA419.webp
    4B27225E-0B76-44DD-9CE8-FD16D1DCA419.webp
    121.9 KB · Views: 38
Thought I would catch up on some progress, I have hopes of getting all the small parts painted next week and striped then we’re off for several months before I can get back to hopefully finish the project.
 

Attachments

  • 1F0BEC53-CB8F-4931-ADD5-B0775BA1F9E8.webp
    1F0BEC53-CB8F-4931-ADD5-B0775BA1F9E8.webp
    155.4 KB · Views: 33
  • CE2442D0-79CB-4E5D-970C-63D8575130AC.webp
    CE2442D0-79CB-4E5D-970C-63D8575130AC.webp
    232.5 KB · Views: 32
  • 271C2119-B3F1-4251-88F5-A82612FFECAD.webp
    271C2119-B3F1-4251-88F5-A82612FFECAD.webp
    117.8 KB · Views: 30
  • 915EBA6C-C430-40AD-8B41-A8AFD9AE9189.webp
    915EBA6C-C430-40AD-8B41-A8AFD9AE9189.webp
    132.9 KB · Views: 32
  • E7CD1747-26A9-40C2-ABF2-D18DCB240A7D.webp
    E7CD1747-26A9-40C2-ABF2-D18DCB240A7D.webp
    140.5 KB · Views: 33
Opps the last one was blurry
 

Attachments

  • AE7BE6FB-D020-489A-BA21-80B96128183E.webp
    AE7BE6FB-D020-489A-BA21-80B96128183E.webp
    179.2 KB · Views: 34
Finally getting back to work, seems like the more I do the farther behind i go. Took forever to get cowering to line back up after the new firewall. Then slow and painful trying to get stripes to match. Not perfect but will have to do. Time to lay all the small parts out and start final assembly, I hope. Plans to assemble and have flyin soon as it warms up next year.
 

Attachments

  • 93644FE1-B114-4ADB-90EA-E788C45C43A3.webp
    93644FE1-B114-4ADB-90EA-E788C45C43A3.webp
    131.8 KB · Views: 25
  • 25B0F543-9299-4A5A-A179-3DCB10344BAE.webp
    25B0F543-9299-4A5A-A179-3DCB10344BAE.webp
    56.1 KB · Views: 22
  • 23D956CC-7A81-4CA7-AA6F-C0991E31EDDC.webp
    23D956CC-7A81-4CA7-AA6F-C0991E31EDDC.webp
    108.2 KB · Views: 22
  • 98DC0377-B31D-4503-9523-D7194F108D2C.webp
    98DC0377-B31D-4503-9523-D7194F108D2C.webp
    83.7 KB · Views: 22
  • F2536647-7B32-49DD-AB0E-3DF6B1BD0D29.webp
    F2536647-7B32-49DD-AB0E-3DF6B1BD0D29.webp
    144.9 KB · Views: 21
  • 8BC56308-C6DC-4663-84C6-B43E29081973.webp
    8BC56308-C6DC-4663-84C6-B43E29081973.webp
    94.9 KB · Views: 22
  • 116FA183-EFB5-40F6-8D9B-B263F6854EBD.webp
    116FA183-EFB5-40F6-8D9B-B263F6854EBD.webp
    76.6 KB · Views: 22
  • 0AE532AD-1BD3-4E42-8BCA-D140A1C0B2A3.webp
    0AE532AD-1BD3-4E42-8BCA-D140A1C0B2A3.webp
    91.1 KB · Views: 25
Wow, just checked the start of this thread, you are coming up on 3 years. Did you expect it to take that long when you started?
 
This is a 6 month project that has many interruptions, seems like every time I start on it some life event happens. Don’t despair I have another plane I’m flying so not bad withdraws
 

Attachments

  • D3809F70-C825-4F51-B983-51CA3964FCCD.webp
    D3809F70-C825-4F51-B983-51CA3964FCCD.webp
    236.2 KB · Views: 25
I have a buddy who is rolling on to five years on a Taylorcraft. I covered his wings and tail feathers in a heartbeat; waiting on the fuselage. Maybe now that the Stearman is down for mag overhaul he will finish the cotter keys and get it to my shop.
 
This is a 6 month project that has many interruptions, seems like every time I start on it some life event happens. Don’t despair I have another plane I’m flying so not bad withdraws
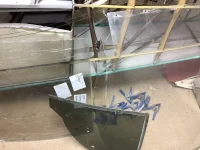
Warrior? Nice looking airplane, glad to see you're back from vacation and working on things again. :)
 
Back
Top